'fraid I kind of messed up my elbow with all of the impact this past week. It's just tendonitis, so no big deal, but since I can't pick anything up, I suppose I'll be forced to give Trixie a little breather, until my right elbow forgives me. I should be able to get back to it later this week. Grumble, grumble....
Stay tuned!
Monday, May 28, 2012
Saturday, May 26, 2012
Day Six
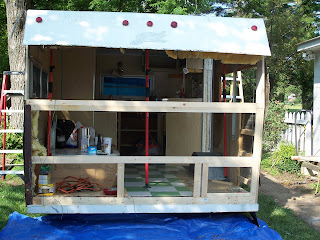
Phew! A heck of a day. But at least it is a "you can see what I did" day.
Here's where we (Tilly and I) started:

I'll tell ya, though, I was REALLY worried that the skin was not going to fit back on. Now that would have made for a fun day.
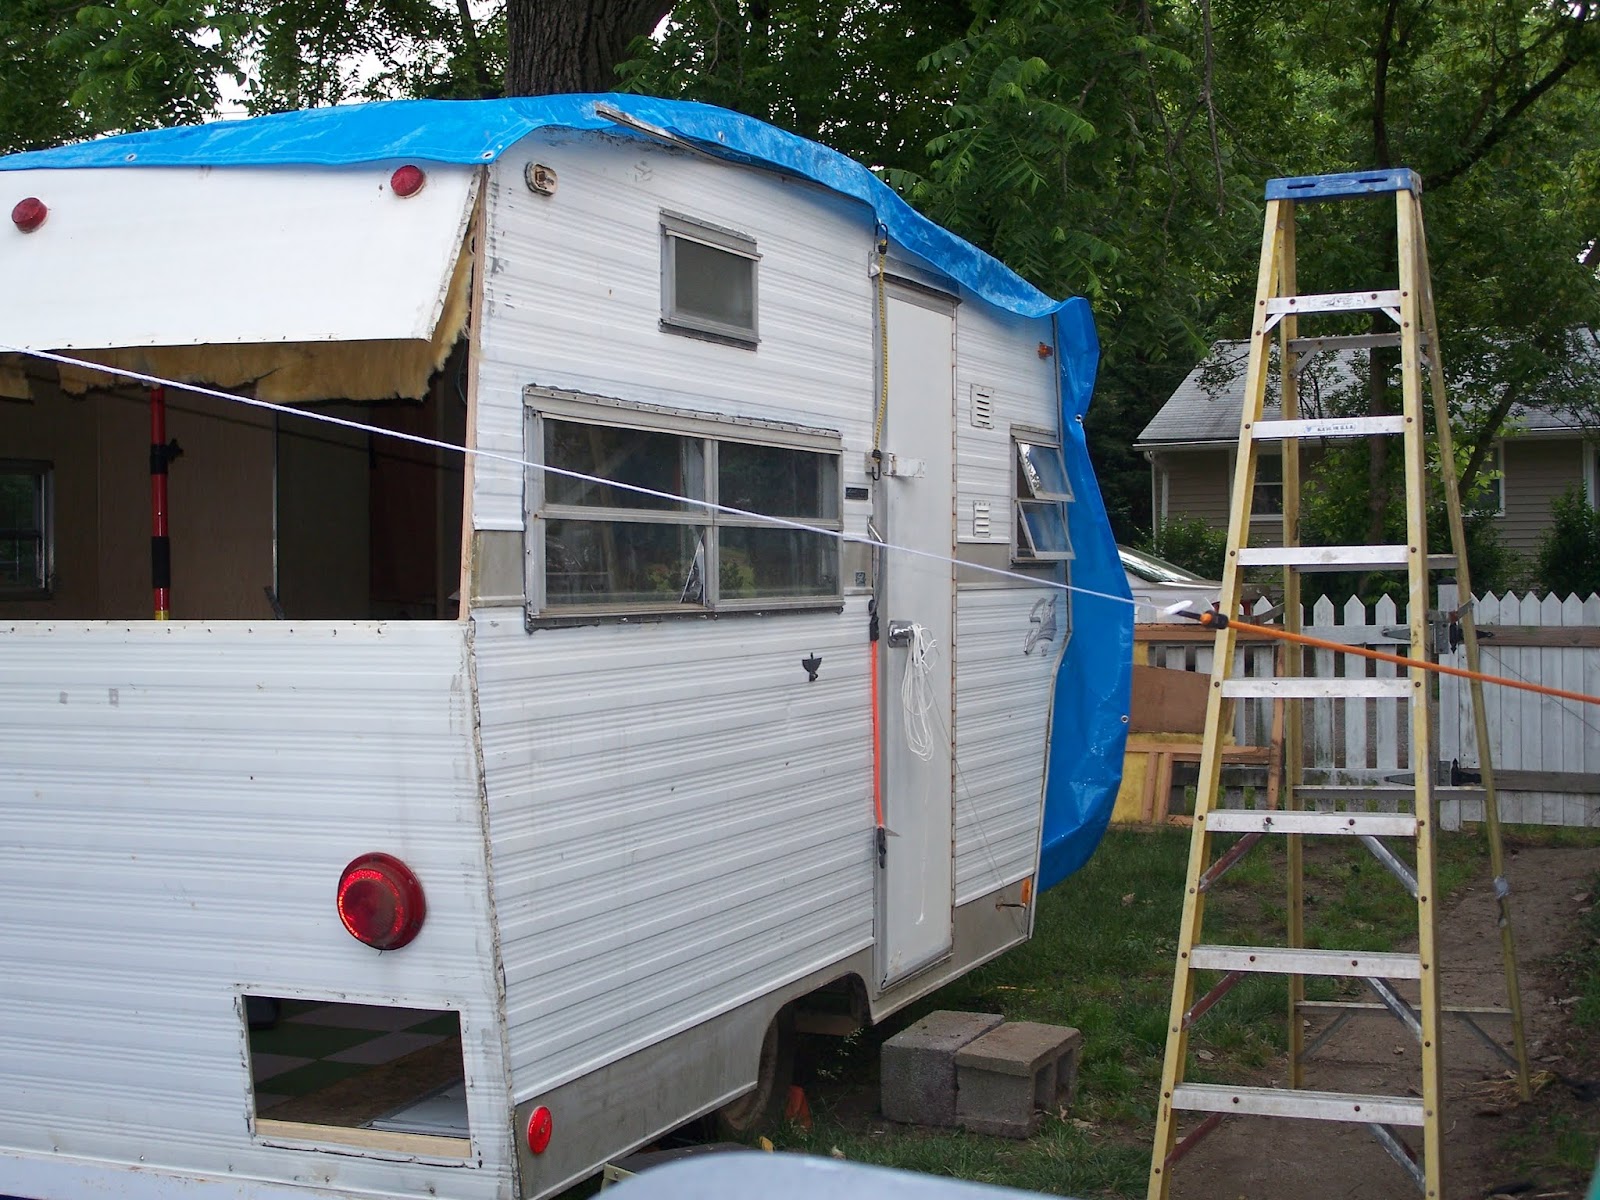
Lots and clamps and staples later, here's the rear view now:

And the starboard side:

All new butyl tape under each seal. Clear sealant in each hole. The window is still a bit of a problem, though. I had a really tough time lining up the screw holes in the aluminum. What is really peculiar is that I figured if I could get the four corners in, the rest would just be easy peasy. Not so much! Although the top row is in entirely, and so is the left side, there are 4-5 screws in the bottom that I just can't seem to make work and none of the ones on the right seem right. Of course I can always drill new holes, but this poor little camper has enough holes without my creating more on purpose.
I'll be taking a day off from Trixie tomorrow. My grass needs cutting, my tomatoes need planting and my house is a wreck. But I'll be back on the job on Monday.
Oh! I forgot to show you the ceiling vent:

Its hard to tell from this photo, because I have caulk solvent all over it, but there is black tar-like stuff all around the vent opening. I think it is roof tar. What awful stuff to remove. What you see here is after I spent an hour and a half scraping off as much as I could. Some of it is as much as 1/3 inch deep! And it is applied over caulking in some areas. What a mess.
What I know now is that the caulking solvent did absolutely nothing. Next, tar remover (something I didn't know existed until today). I could go with acetone, but that can cause other trouble. We'll just have to see how the tar remover works.
OK, campers. That's it for tonight. We're pooped!
************
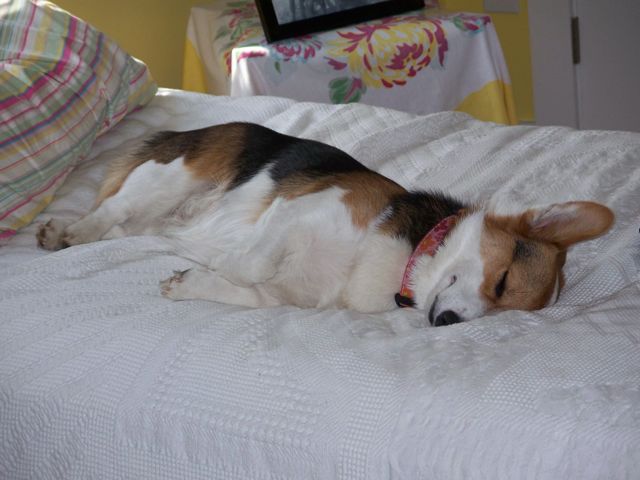
Do forgive me!! I was just reprimanded for not properly introducing Tilly - Mathilde Jane to those of you who have not been properly introduced:

If she appears to you to be lounging on a guest bed, you are mistaken, as that is not allowed.
Tils at the end of a day working on Trixie:

Here's where we (Tilly and I) started:


I'll tell ya, though, I was REALLY worried that the skin was not going to fit back on. Now that would have made for a fun day.
Lots and clamps and staples later, here's the rear view now:

And the starboard side:
All new butyl tape under each seal. Clear sealant in each hole. The window is still a bit of a problem, though. I had a really tough time lining up the screw holes in the aluminum. What is really peculiar is that I figured if I could get the four corners in, the rest would just be easy peasy. Not so much! Although the top row is in entirely, and so is the left side, there are 4-5 screws in the bottom that I just can't seem to make work and none of the ones on the right seem right. Of course I can always drill new holes, but this poor little camper has enough holes without my creating more on purpose.
I'll be taking a day off from Trixie tomorrow. My grass needs cutting, my tomatoes need planting and my house is a wreck. But I'll be back on the job on Monday.
Oh! I forgot to show you the ceiling vent:

Its hard to tell from this photo, because I have caulk solvent all over it, but there is black tar-like stuff all around the vent opening. I think it is roof tar. What awful stuff to remove. What you see here is after I spent an hour and a half scraping off as much as I could. Some of it is as much as 1/3 inch deep! And it is applied over caulking in some areas. What a mess.
What I know now is that the caulking solvent did absolutely nothing. Next, tar remover (something I didn't know existed until today). I could go with acetone, but that can cause other trouble. We'll just have to see how the tar remover works.
OK, campers. That's it for tonight. We're pooped!
************
Do forgive me!! I was just reprimanded for not properly introducing Tilly - Mathilde Jane to those of you who have not been properly introduced:

If she appears to you to be lounging on a guest bed, you are mistaken, as that is not allowed.
Tils at the end of a day working on Trixie:
Friday, May 25, 2012
Day Five
Hi Everyone!
Well, today isn't going to go be one of those Wow days, visually, but that's OK. Today's primary goal was to remove all of the gunk on the edge of all of the aluminum so that I may fasten it to the new spiffy framing, then apply butyl tape and close it up. There is every imaginable type of caulking all of this puppy, so that was a real challenge. The surface is not flat, it is easily damaged, you can't use a metal scaper and you run into screw/nail/staple holes every couple of inches. Otherwise, it's a cinch!!
Here is a photo from first thing this morning. You're looking at the port side rear.

At this time, I thought this was one of the worst spots, so I used it as an example. WRONG!!! Be that as it may, you see latex caulking, then the remnants of the old type of butyl tape, two stales and dirt. And look! The quilted section actually used to be gold. Can you see it on the right? Who knew!!
I worked on removing this stuff for two hours, at which point I decided that there just HAD to be a better way. So I drove up to the closest hardware store to find caulking solvent/remover. They didn't have it. Fine! I went to the next hardware store up the street and they had it. That added an hour to the day (grumble, grumble, snort). But I spread the remover all over the caulked areas and waited two hours.
What did I do during that two hours? Drink margaritas? Run a marathon? Why no? I'll show you.
Trixie now has two, count 'em, two new outlets!


The one above is affectionately known as the Jesus outlet. Clever, right? Well, the Jesus light came with Trixie. I happen to think it is all part of a bigger plan. I wonder if this is what God meant by "Jesus is the light.". OK. Don't get bent out of shape. God INVENTED the sense of humor, you know. I actually really like this light.
I put in the remainder of the rear panel framing. Originally there were only three slats, but I wanted one more.

The ceiling vent was bent in many places, was covered in electrical tape, duct tape and sealants of every possible variety. I bought a new vent last week that actually had a little fan in it, so I figured I should look into the wiring possibilities while I was already making a big mess. The whole camper is covered in a massive tarp right now (Thanks, Tom!!), so out came the old wreck of a ceiling vent. It wasn't easy, mind you. It took multiple screw drivers, two putty knives, a hack saw and a crowbar, but the blasted thing finally came out. Phew! The framing, although not perfect, still looks pretty good.
This area is just a foot or two from the bathroom, where all of the 12v power lines emanate, so this shouldn't be bad.


Oh golly gee. Ya think THIS might be it? This photo actually makes it look not so bad. NOT SO FAST!! in that corner there is literally a hole in the framing that goes back 1.5 - inches and then I just can't see. Really!?! Is this necessary? I won't be able to fasten the new vent/fan until this is repaired. Oy!!

But there is some good news. After a 2.5 hour wait, here are the results of the caulk remover. Go all of the way back to the top of today's post and you'll see the "Before" photo. NICE!!

Uh oh, though. It takes off caulking like a dream, but WHOA, it also removes the paint! Look how sparkly it is! Fortunately I have a few cans of Rust-Oleum primer, so I'll hit this first think in the morning.

Unfotunately, I found the very worse caulking area, but didn't think to take a photo of the "before" scenario. But suffice it to say that I applied a second coat of the caulk killer and I'll attack it in the morning.
I think that is about it for the day. We'll get together again tomorrow!!!
Well, today isn't going to go be one of those Wow days, visually, but that's OK. Today's primary goal was to remove all of the gunk on the edge of all of the aluminum so that I may fasten it to the new spiffy framing, then apply butyl tape and close it up. There is every imaginable type of caulking all of this puppy, so that was a real challenge. The surface is not flat, it is easily damaged, you can't use a metal scaper and you run into screw/nail/staple holes every couple of inches. Otherwise, it's a cinch!!
Here is a photo from first thing this morning. You're looking at the port side rear.

At this time, I thought this was one of the worst spots, so I used it as an example. WRONG!!! Be that as it may, you see latex caulking, then the remnants of the old type of butyl tape, two stales and dirt. And look! The quilted section actually used to be gold. Can you see it on the right? Who knew!!
I worked on removing this stuff for two hours, at which point I decided that there just HAD to be a better way. So I drove up to the closest hardware store to find caulking solvent/remover. They didn't have it. Fine! I went to the next hardware store up the street and they had it. That added an hour to the day (grumble, grumble, snort). But I spread the remover all over the caulked areas and waited two hours.
What did I do during that two hours? Drink margaritas? Run a marathon? Why no? I'll show you.
Trixie now has two, count 'em, two new outlets!


The one above is affectionately known as the Jesus outlet. Clever, right? Well, the Jesus light came with Trixie. I happen to think it is all part of a bigger plan. I wonder if this is what God meant by "Jesus is the light.". OK. Don't get bent out of shape. God INVENTED the sense of humor, you know. I actually really like this light.
I put in the remainder of the rear panel framing. Originally there were only three slats, but I wanted one more.

The ceiling vent was bent in many places, was covered in electrical tape, duct tape and sealants of every possible variety. I bought a new vent last week that actually had a little fan in it, so I figured I should look into the wiring possibilities while I was already making a big mess. The whole camper is covered in a massive tarp right now (Thanks, Tom!!), so out came the old wreck of a ceiling vent. It wasn't easy, mind you. It took multiple screw drivers, two putty knives, a hack saw and a crowbar, but the blasted thing finally came out. Phew! The framing, although not perfect, still looks pretty good.
This area is just a foot or two from the bathroom, where all of the 12v power lines emanate, so this shouldn't be bad.

Egads! What is all of this mess on the floor, you ask? Why, there in the midst of the third hands, the Shop Vac and the stepladder, I cannot imagine what is the cause of all of the flotsam and jetsam.

Oh golly gee. Ya think THIS might be it? This photo actually makes it look not so bad. NOT SO FAST!! in that corner there is literally a hole in the framing that goes back 1.5 - inches and then I just can't see. Really!?! Is this necessary? I won't be able to fasten the new vent/fan until this is repaired. Oy!!

But there is some good news. After a 2.5 hour wait, here are the results of the caulk remover. Go all of the way back to the top of today's post and you'll see the "Before" photo. NICE!!

Uh oh, though. It takes off caulking like a dream, but WHOA, it also removes the paint! Look how sparkly it is! Fortunately I have a few cans of Rust-Oleum primer, so I'll hit this first think in the morning.

Unfotunately, I found the very worse caulking area, but didn't think to take a photo of the "before" scenario. But suffice it to say that I applied a second coat of the caulk killer and I'll attack it in the morning.
I think that is about it for the day. We'll get together again tomorrow!!!
Thursday, May 24, 2012
Day Four
Another very good day. If it hadn't required two trips out to the store for things I didn't have - and who can believe there is anything left that I don't have of the hardware variety - it would have been even more productive. Be that as it may....
First, I took out the starboard window. Didn't I say that I was going to do that last Saturday?

There don't appear to have been any leaks around this window, so hooray for me for potentially breaking something that weren't broke!! I had to take it out to fix the framing though.
Remember that whole rotted corner on the port side? A reminder...

Well, this is what it looks like now!


A little better, right?! Yeah, just a little. Here is the view from the inside. The original had 4 separate pieces stabled together to make what is now two pieces heavily joined, not only with screws, but with PL adhesive. Perdy, ain't it! I like the look of the Kreg jig marks. Looks like little feet marks.

Remember all of that rot on the starboard side?


Here is what it looks like now. VERY solid.


I have a few more stabilizing framing pieces to put in, but I can do that from inside the camper now.
It is amazing how much more gets done with 4 hands rather than just my 2. Thanks, Chris!!!
Before Chris left, we took apart all of the framing, added either PL adhesive or super duper wood glue and screwed it all back together again. Only a few drips. And it still fits together!! Woo hoo!!
Tomorrow I'll start working on cleaning up all of the aluminum edges and J-rail, removing all of the old gunk so that I can add new butyl tape and put it back together again.
'night All!!
Thanks again, Chris!!
First, I took out the starboard window. Didn't I say that I was going to do that last Saturday?

There don't appear to have been any leaks around this window, so hooray for me for potentially breaking something that weren't broke!! I had to take it out to fix the framing though.
Remember that whole rotted corner on the port side? A reminder...

Well, this is what it looks like now!


A little better, right?! Yeah, just a little. Here is the view from the inside. The original had 4 separate pieces stabled together to make what is now two pieces heavily joined, not only with screws, but with PL adhesive. Perdy, ain't it! I like the look of the Kreg jig marks. Looks like little feet marks.

Remember all of that rot on the starboard side?


Here is what it looks like now. VERY solid.


Same wall, under the window, from the outside.

It is amazing how much more gets done with 4 hands rather than just my 2. Thanks, Chris!!!
Before Chris left, we took apart all of the framing, added either PL adhesive or super duper wood glue and screwed it all back together again. Only a few drips. And it still fits together!! Woo hoo!!

Tomorrow I'll start working on cleaning up all of the aluminum edges and J-rail, removing all of the old gunk so that I can add new butyl tape and put it back together again.
'night All!!
Thanks again, Chris!!
Wednesday, May 23, 2012
Day Three
Today was a great day! A little slow, but still great.
I really struggled with the disparity of measurements from the port side to the starboard and it took me a long time to figure out how to compensate for those. If I were starting all of this over again, I would have just taken out all of the "repairs" done by a previous owner on the interior walls and started from scratch. I would have saved a lot of time. Live 'n learn.
Here you can see that the bottom of the rear is now all framed in. Mind you, 100% of it will have to come out again, but that's OK. Using screws makes that easy. Once I have what I think are all of the new pieces in place, I'll refit the skin and windows. If all of that goes back on/in correctly, I'll remove/re-affix each new piece with glue and screws.

Having so much stuff inside the camper obscures the view a bit, but, hopefully, you can see.
With all of the lower framing in, I spent an hour or so taking off the J-rail from the top part of the rear and removed the skin from the upper rear (still have the top rear to go). Demo (as I have likely already mentioned) is a royal pain and VERY time consuming. This time I found not only the expected hex screws and staples, but also more drywall screws and every possible type of nail. Come on, people!! You couldn't run down the street to your local handy dandy hardware store and at least get something galvanized!!?? Jiminy H. Crickets!!
Today was the first time that I got to see anything much above where I've been working. I knew that it couldn't be good, though, because the highest I could see was rotten. So, finally, with the upper part of the back skin off, I could see there those upper framing pieces start. Here is the port side. the large cracked piece that you can see here is the interior paneling that is behind the upper bunk. It cracked when I removed the framing at the bottom. You can see where that framing came off by the rot on the bottom couple of inches of paneling.
Here is the starboard side opposite the rotted port side above. Although I knew that the piece on the far right was rotten, I suspected that the piece next to it was also. Not at all. It is in good shape. Again, the piece to the left of this is the backing of the bunk. It'll have to come out because the port side of it is rotten. Shocking!

What on earth would I have done without these wonderful "3rd Hands". Brilliant. You can see how I've propped up the upper rear skin.

Say bye, bye! No more paneling. What remains here is one of the stabilizing pieces of framing for the bunk. That's good so it can stay.

The next job is to remove the skin from the remaining pieces of framing, so that I can get that bad framing out. That'll take a few hours, so I thought it best to hold off until tomorrow morning. Time to get cleaned up for the night. I might have some help tomorrow, so maybe you'll see more progress tomorrow night!
'night campers!
Tuesday, May 22, 2012
Day Two
I was so afraid that I was going to lose another day to rain, but after some morning showers, I was able to get busy. You aren't going to be able to see a lot of where today's effort went, though. I had a plan, complete with drawings and measurements. However, that plan required a lot of ripping to get a batch of 1x2s and beveling. However, something is wrong with my table saw. It took me a few hours to diagnose/try to fix/give up on the table saw. That meant that I had to bevel with a Skilsaw (ARG!!) Also, without a full set of framing on either side, I was guessing about how much of the back wall was supposed to attach to the sides. Then, when I realized that I was not going to have my table saw to help, I decided to give up on ripping everything and use what I had (1x3s in most cases, versus 1x2s), so I had to redo the measurements. Blah, blah, blah.
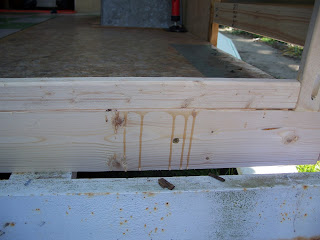
Here is a shot of the back now. You can see where I replaced the rear lower framing just behind the bumper. Because the paneling used to go between the floor and that new piece, I cut a piece of paneling to be the same height of the 1x4 to make sure that I didn't mess up the overall measurements. When I put the paneling in from the inside, it will obviously no longer go between the floor and that outside board. I don't know if that is right or wrong, but short of assembling the entire back wall with the paneling in place, then putting it up, I didn't know how else to do it.

Here is another strange thing. On both sides, there is a piece of framing that goes from the very bottom, up to where the skin changes angles. On the port side, you can see the really dark brown board. On the right, you can see my new light colored board. Both boards start in exactly the same place and stop at exactly the same place. However, the port side board is 1/4" longer than the starboard side. Swell. I have to make sure to get the next piece right (it connects the two boards I just mentioned all of the way from one side to the other. More importantly, the board that sits on top of that has to support the window. That's a riddle for tomorrow.
I'll move around to the starboard side, so you can see where I replaced part of that lowest board on that side. You can also see the first part of inside framing peeking out from under the skin. Oh boy!

Here's a shot from the inside starboard corner. On the port side, the lower part of the port side framing is shy of aligning with the rear framing by 1/4", so I did the same thing on the starboard side, but it just doesn't look right to me. Fortunately, I used screws (rather than the original nails), so if I need to take something apart and do it again, it won't be too hard. Well, it won't be too hard PHYSICALLY; emotionally is another thing entirely.

One more from a different angle.

You can see a little bit better that there is the first starboard side of the rear panel framing.
Looking again at the starboard side, you see that 1x2 vertical that needs to come out. In order to do that, I have to peel back the starboard skin again and go up higher. I don't really know how far up that piece is rotten - or how far up it goes. I'll find out tomorrow!!!
'night happy campers!
Sunday, May 20, 2012
No work today.
I was up to my eyeballs in another project today, so all I really did was double/triple wrap Trixie in more tarp, preparing for Tropical Storm Alberto. My hope is that it was all for naught and Alberto just finds his way out to sea, leaving us alone. Doesn't he understand that I have camper work to do?!
Men!
Men!
Saturday, May 19, 2012
The Real Day One!!
Hello Campers!!
Today is the first day of my week off and I got started bright and early. Two trips to Lowe's and one to Home Depot later, I was ready to set up shop at about 8:30a. I put up a canopy last night to help out with both sun and rain and here is a shot of my outside workshop.

It's a little hard to see what is what because of the dappled light, but you get the general idea. The first job is to take out the starboard side window. For those of you who have been "gently" reminding me to put up T bars, I did! I started out with two and ended up with four. I used 2x4s and 3rd Hands (wonderful inventions).

I also made good use of some old T-shirts to get a snug fit without damaging the ceiling (t-shirts for t-bars....get it!?). OK. Sorry.

My plan is to take out the starboard window, then peel back the bottom corners from the lower starboard and lower right rear to replace the rotted framing. By taking out the starboard window, I free up the framing (or what is left of it) from under that window, as the screws that hold the window into place also hold the framing into place. Seriously. I didn't make that up. Believing that I would need to hop to and get the new framing in asap, I figured I'd better test my skills with the new Jr. Kreg jig. What a great tool! Easy peasy.

I've already measured for the horizontal framing pieces on the starboard side, so I cut and Kreg'd those. Nice!

So here is the starboard side window - "before". It took only a few minutes to get all of the screws out, but there is a LOT of caulking around this thing. I didn't try pulling out the window right away. I decided to go ahead and remove the J rail so that I would be prepared to pull away that starboard corner.

No photo for that, but taking out the J rail screws on the starboard side was no problem, but taking out the #!%*&!@! staples was a royal pain and took about an hour. Mind you, it look another 30 minutes or so to actually extract the staples from the skin. Holy cow!! I thought that the skin was just screwed into place. Not so much. And those staples were rusted to beat all. Sheesh!! No, I didn't stop to get the Tetanus shot today, but I will. I will!!!
Knowing that I also need to take out the rear window, I decided to go ahead and do that next. Get that weight off of the frame before I continue. There were boatloads of thick, gummy black stuff all around the rear window frame. Very tar-like. Not like butyl type, which has more of a molding clay consistency, but really like tar. Awful stuff. I had to work a plastic putty knife into it using the rubber mallet to get through the stuff. But here is a photo with the rear window out.

Ruh row. Take a look at the rear port corner. Up until now, the starboard corner has gotten all of the attention. I'm not sure how well this will come through, but it wasn't pretty. You can see the remnants of the black goo a little bit. If you look down in the corner, you can see that it was just globbed in there to fill in for missing wood. Eeeeesh!! But I moved on to the port side J rail.

Oh! I didn't mention the dadblamed drywall screws!!!!!!!! Oh yeah. About half of the screws in the port side J rail were drywall screws. Rusted drywall screws. Good Lord, give me strength!! Half of those were very rusted and the slots in the heads just became circles with the first hit from the driver. Jiminy H. Crickets!! So I pulled out the Drexel Multi-tool metal cutter. It is very, very thin and fabulous at cutting nails and screws - unless, of course, they are hardened drywall screws. Alright, I won't go on about this, but it took me an hour and a half to get those babies outta there.
For some reason, three of my photos did not come out. One is what the back looked like when the whole outer skin was removed. This is while I had just the starboard rear corner propped up and out of the way. This is the view of that starboard corner. The framing toward the middle is just fine. I knew that the corner was going to be bad. I decided, ultimately, to take off the whole lower back panel, because it was easier than keeping that corning propped up and I was concerned about bending it.

But then something new happened. Look at what I found under the skin. So much for the port corner, which I thought was in pretty good shape.

The top framing strip was a patch job and the framing toward the middle has been eaten away. The next photo is of the middle framing strip. It isn't attached to anything and the far left section is missing entirely.

Tra la la la la.
Fine. It will be easier to replace the whole back panel than patching it together anyway. But, darn!
But wait, there's more!!!!The whole back panel just fell out. By that, I mean what you see in the photo above: framing, insulation and interior panelling! Not really a shock, of course, what was to hold it in place? Unfortunately, the next photo of the whole back out is one of the three that doesn't want to upload. I'll take another one tomorrow. I must say, it is awfully easy getting into and out of the camper with the whole back wall gone.
Poor Trixie.
So then, with the whole back off, I cleaned up the wood as best I could and started a Plan B. Plan B requires that I pull out the rest of those blasted staples, so I worked on that for another hour or more. I also had to go back to Home Depot for a few 1x4s. I'll need to replace some of the pieces that are affixed to the floor.
I stopped to begin clean-up at about 7p. All of this took far longer that I would have liked, but none of it is really surprising. If I'd had another half day of sunshine, I think that I could have had the framing back together again. Tomorrow I'll be tied up until about 3 pm, so I don't know how much I'll get to, but if the weather cooperates, I'll be back on it Monday morning at sun-up. Here is Trixie all tucked in for the night. The tarp is tucked up under where the window goes.
Oh! I never did get that starboard window out. Not really any point just yet. More to do before I go there.

'night Trixie.
Sunday, May 13, 2012
Good news day!
I didn't have tons of time today, but I had enough time to take out the long bench on the starboard side. That was interesting. I learned several useful things, although not necessarily in the most beneficial order. First, I was reminded that these campers were put together in exact opposite way that I house is built. In other words, these are built from the outside in. How was I reminded of that, you ask? Good question! First, let me say that I'll be dropping by the doctor's office tomorrow afternoon for my regular Tetanus booster.
Take a look at this:

Can you see three little things that look like lines or staples just to the right of the access panel? Yeah? Guess what. They aren't lines or staples. They are nails. Rusty nails, of course. And they are protruding INTO the camper about an inch. That narrow end of the bench was nailed to the paneling from the outside. Not to worry, though, those nails were still good and sharp. Solid craftsmanship.
A closeup.

Moving on! No more bench! Well, actually, it's just now in the garage. And a stabilizer to hold up the room while I pull away the supporting walls.

But with the bench out of the way, I was able to finish the "looking for the end of the rot" process below the window. Happily, what I found that just beyond what I'd already cut away is GOOD WOOD!!! Hooray. OK. That helps me put a stop to the very slippery slope of "well, since I'm doing this, I might as well do that too" syndrome. Also known (thank you, Greg) as Shipwright's Disease. Phew. I'm going to have to learn to be OK with some of this stuff until I get the know-how to do a full restoration.
Here is a photo of the fully cut out lower half of that section. The vertical piece is perfectly good and so is the middle horizontal piece. The right half of the top and bottom pieces need to go, but they are independent pieces, so that isn't so bad.
This week's task is to come up with a full shopping list of everything that I'll need next week - the "big push" week to get as much of this fixed as I possibly can. I'm hoping for an extra set of hands on one of those days for this carpentry work. I need to get the bunk out, but it is really heavy, so I'll need another body for that one. Tetanus shots are one thing, but broken body parts or - heaven forbid- damage to the aluminum - are quite another. Safety first! Well, after the rusty nails incident, anyway.
I've taken every measurement that I can think of to help me put things back together again. Keep your fingers crossed.
Next, I've removed most of the cabinet doors to get them ready for a little clean up. The ones that are now the facade of the shower were screwed on from the inside of the shower room and the shower stall was installed over those screws, so I don't have any way to unscrew them, sort of pulling the shower stall away from the wall. Not appealing. So I suppose I'll have to use the handy dandy multi-tool and cut the screws from the outside and then screw the drawer covers back into place.
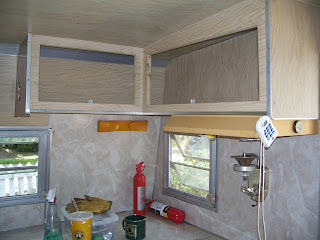
Here's what's new on the port side:
Kitchen
 Bathroom

Dinette. Not much to see there, as I've been using that as a work space.

Here are some close-up shots of those panels that were replace by a previous owner. I don't think it was done by the owner just before me, though. (They did the bathroom and the green/white tiles, though.) I need to figure out what to use to seal these seams. Can you see them in these photos? Look at the one immediately below between the white panel and the dark one to its left. The gap all of the way down that area is from 1/8 to 1/4". You can see the yellow stuff. No idea what that is, except that it doesn't like to be sanded.

You can see below more of the yellow stuff. You can also see, at the top of the photo below, just below the window, how the surface laminate is popping off. I'm trying to be a big girl, take a deep breath and just leave it alone for now. It's tough! It's kinda like not picking a scab. Yeah, that's gross, but tell me you don't have a hard time not doing it. If you say that you don't, I don't believe you.

That's it until tomorrow, camper fans.
Take a look at this:

Can you see three little things that look like lines or staples just to the right of the access panel? Yeah? Guess what. They aren't lines or staples. They are nails. Rusty nails, of course. And they are protruding INTO the camper about an inch. That narrow end of the bench was nailed to the paneling from the outside. Not to worry, though, those nails were still good and sharp. Solid craftsmanship.
A closeup.

Moving on! No more bench! Well, actually, it's just now in the garage. And a stabilizer to hold up the room while I pull away the supporting walls.

But with the bench out of the way, I was able to finish the "looking for the end of the rot" process below the window. Happily, what I found that just beyond what I'd already cut away is GOOD WOOD!!! Hooray. OK. That helps me put a stop to the very slippery slope of "well, since I'm doing this, I might as well do that too" syndrome. Also known (thank you, Greg) as Shipwright's Disease. Phew. I'm going to have to learn to be OK with some of this stuff until I get the know-how to do a full restoration.
Here is a photo of the fully cut out lower half of that section. The vertical piece is perfectly good and so is the middle horizontal piece. The right half of the top and bottom pieces need to go, but they are independent pieces, so that isn't so bad.
This week's task is to come up with a full shopping list of everything that I'll need next week - the "big push" week to get as much of this fixed as I possibly can. I'm hoping for an extra set of hands on one of those days for this carpentry work. I need to get the bunk out, but it is really heavy, so I'll need another body for that one. Tetanus shots are one thing, but broken body parts or - heaven forbid- damage to the aluminum - are quite another. Safety first! Well, after the rusty nails incident, anyway.
I've taken every measurement that I can think of to help me put things back together again. Keep your fingers crossed.
Next, I've removed most of the cabinet doors to get them ready for a little clean up. The ones that are now the facade of the shower were screwed on from the inside of the shower room and the shower stall was installed over those screws, so I don't have any way to unscrew them, sort of pulling the shower stall away from the wall. Not appealing. So I suppose I'll have to use the handy dandy multi-tool and cut the screws from the outside and then screw the drawer covers back into place.
Here's what's new on the port side:
Kitchen


Dinette. Not much to see there, as I've been using that as a work space.

Here are some close-up shots of those panels that were replace by a previous owner. I don't think it was done by the owner just before me, though. (They did the bathroom and the green/white tiles, though.) I need to figure out what to use to seal these seams. Can you see them in these photos? Look at the one immediately below between the white panel and the dark one to its left. The gap all of the way down that area is from 1/8 to 1/4". You can see the yellow stuff. No idea what that is, except that it doesn't like to be sanded.
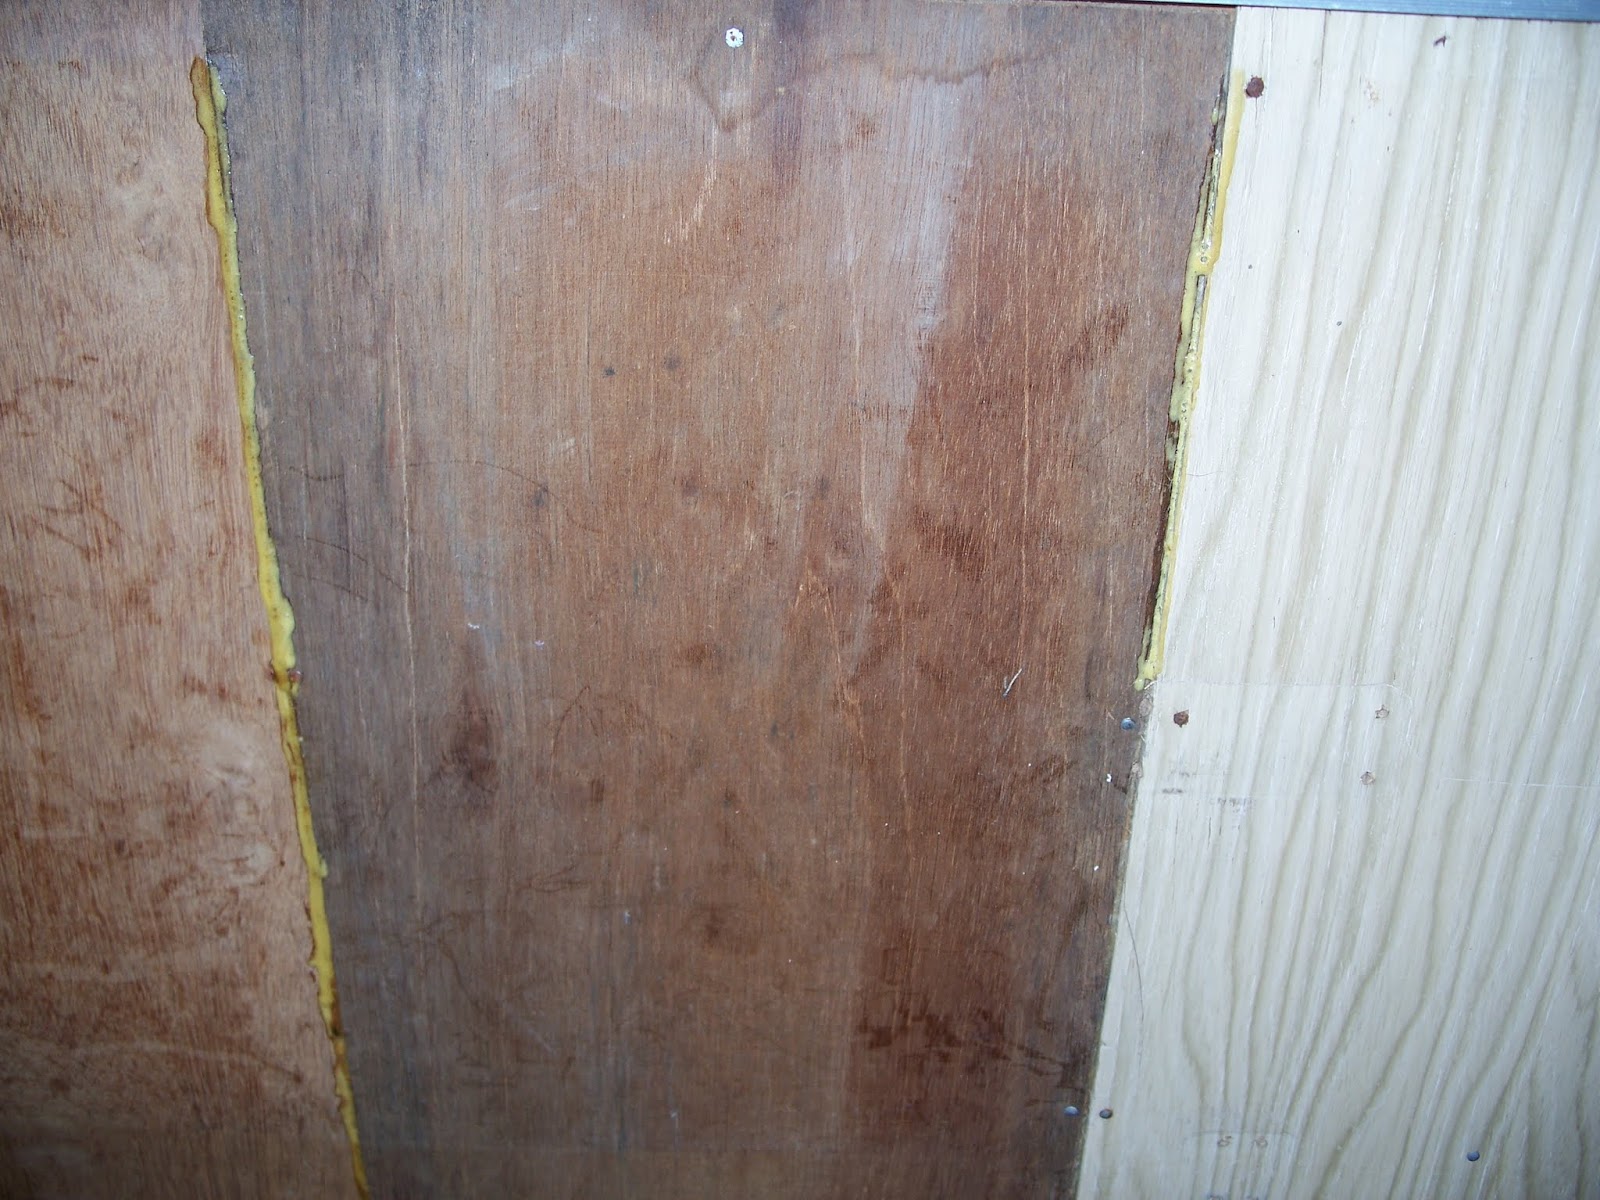
You can see below more of the yellow stuff. You can also see, at the top of the photo below, just below the window, how the surface laminate is popping off. I'm trying to be a big girl, take a deep breath and just leave it alone for now. It's tough! It's kinda like not picking a scab. Yeah, that's gross, but tell me you don't have a hard time not doing it. If you say that you don't, I don't believe you.

That's it until tomorrow, camper fans.
Subscribe to:
Posts (Atom)